Showing posts with label ubuntu. Show all posts

Wednesday, March 1, 2023

Splitting Kali VM's partitions, or why I do not like the default (Desktop) Linux partitioning scheme

WARNING:

  1. Just because I am mentioning Debian/Ubuntu Linux in my rant, it does not mean the RedHat-derived distros are guilty free. In fact, I am looking at you, Fedora. The reason I am mentioning the Debian-derived distros are because
    • Kali is built on Debian.
    • I usually run an ubuntu derivative desktop Linux in my laptop.
    The principle of my rant still remains, and is really not as security- or privacy-oriented as the other blog posts.

  2. This post will be a bit more technical than the usual, and will not take the time to explain certain things or this will become a book. There are other shows to watch.

Like many, I have Kali Linux installed in a virtual machine I use for things. Given the requirements in their install page, which said

On the higher end, if you opt to install the default Xfce4 desktop and the kali-linux-default metapackage, you should really aim for at least 2 GB of RAM and 20 GB of disk space.
I thought it was fine building a vm following those specs to run Kali. The memory I was not that concerned because adding more to a KVM vm guest is pretty easy (provided you have some to spare). But we are not talking about how to build a Kali vm guest; there are a lot of blogs and websites claiming to provide "everything you need to know about" how to do the deed, where the everything keyword means "we will rush through it but pretend we are experts." Am I being an arrogant bastard? Quite possibly, so let's jump to an example.

The problem
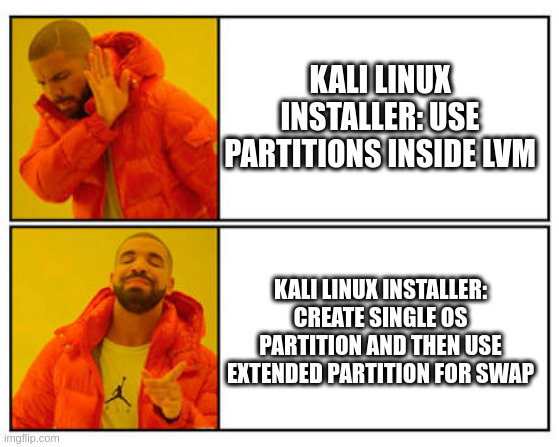
I am kinda of particular about the partition layout I use. In fact, let's take a quick look at my desktop (where I am typing this right now):

Device       Start       End   Sectors  Size Type
/dev/sda1     2048   2099199   2097152    1G Linux filesystem
/dev/sda2  2099200   3147775   1048576  512M EFI System
/dev/sda3  3147776 212862975 209715200  100G Linux LVM

Those whith sharp eye noticed I have made the partition for that FAT offspring, EFI, which is way larger than needed. Call me lazy. What you may not be aware is that this is a 1TB (in Subway sandwich math; it really is 931.53 (GiB) if we use powers of 2 just like C'Thulu intended us to do) drive. In other words, I did not create a partition that ranges the entire disk as I found to be the default in most Linux installations, specially desktops. You know, because everyone installs the OS such that to use the entire drive. Who would do anything else?

Next you will notice there are 3 partitions:

  • /dev/sda1, which is the /boot
  • /dev/sda2, which is the already-mentioned EFI
  • /dev/sda3, which is a LVM physical volume for everything else.
I like this format since it works for both MBR and GPT styles of partition tables: I can have 3 "primary" partitions in the older MBR style without breaking a sweat. Consistency is good. Now we can talk about the partition for everything else: since it is a lvm physical volume, I then split it up into separate partitions and assign them to some directories, namely (vg name changed to protect the innocent. However, I chose not to sanitize the name of the swap partition before posting it here)

LV       VG     Attr       LSize  Pool Origin Data%  Meta%  Move Log Cpy%Sync Convert
home     desktop -wi-ao---- 30.00g                                                    
root     desktop -wi-ao----  4.00g                                                    
swaphole desktop -wi-ao---- 10.00g                                                    
usr      desktop -wi-ao---- 11.00g                                                    
var      desktop -wi-ao----  6.00g

At this point in time someone on the back of the room will shout "Heresy! Separating partitions in their own filesystems is an outdated concept! You should use a single partition! On the top of that you are not using the entire volume group!" Hey, I said I was an arrogant bastard earlier on. Besides, this is my computer. Fear not, for the next paragraphs will justify the heresy claim even better.

For my kali vm guest, I started with a 20GB virtual disk based on the installation page's notes as mentioned above. At the time I decided to let it set the partition table the way it wanted, and here it is

Device     Boot    Start      End  Sectors  Size Id Type
/dev/vda1  *        2048 39942143 39940096   19G 83 Linux
/dev/vda2       39944190 41940991  1996802  975M  5 Extended
/dev/vda5       39944192 41940991  1996800  975M 82 Linux swap / Solaris

It created two primary partitions: one for the OS and one that is there just to create an extended partition to put the swap. Riddle me this: why in a 2-partition drive do we need to use the MBT extended partition? Are we close to running out of partitions that we need to reach for that gimmick? Before you answer, remember my 3-partition layout works fine with that style of partition table. Bottom line is the default installation created two partitions to do the job of a single way. Brilliant!

Let's get to where the fun really is: realistically 20GB for Kali is very limiting at best. If you start colleting a few (sizeable) pcaps or grab a binary file or two to inspect (temp files do add up), you may have maxed it out. That happened to me, combined with forgetting to periodically clean the package cache and getting some bits and bobs for metasploit. And all of this happened when I was on the clock.

Brilliant!

If we use the partition layout I like, I would then resize the drive and extend the PV and then the VG. problem solved. Not so here, thanks to that extended partition that is sitting right in the way. The best I could do was to increase the size of the drive as before, then add another partition at its end:

Device     Boot    Start      End  Sectors  Size Id Type
/dev/vda1  *        2048 39942143 39940096   19G 83 Linux
/dev/vda2       39944190 41940991  1996802  975M  5 Extended
/dev/vda3       41940992 62914559 20973568   10G 83 Linux
/dev/vda5       39944192 41940991  1996800  975M 82 Linux swap / Solaris

Since I did not use lvm on this setup, I would have to decide which directory to move to the new partition, which then leads us to the problem the default install wanted to avoid in the first place. And, we now have a drive whose partition table looks convoluted (the adjective I had in my mind was different, but I decided to find a more polite one) and hard to maintain. At this point the only logical thing to do is blow everything up and redo it with a larger disk.

Brilliant!

And this kind of shenaningans are not only limited to the Kali install; installing the OS in my latop has been even more frustrating, but I will save that to another post.

Is there a better way to solve this problem? Well, it requires some heretic maneuvers, which is why I like it.

The solution

By now we should accept we need to move at least one directory tree out of /dev/vda1 I decree it shall be /home, but where should we put it? I will not extend /dev/vda and add another partition there, so what if we create a second virtual drive? Some of the reasons:

  • It moves a directory tree that can become quite large out of the root drive.
  • Even if you did not use a LVM, which in this case I did not, you can still resize that drive and that partition, without much work.
  • If you need to move files between your kali vm guest and the host, you can shoot the vm down and then mount this second disk. This way there is no programs -- malicious or not -- running in the vm gues and you do not need to create a (exploitable) network connection between the host and guest.
  • If you decide to blow up you kali install, your work is preserved.
  • You can handle /home to somebody else without worrying about compromising your kali passwords.

Enough talk. Here are the steps. I will try to make them as generic as I can but understand most of the time I not only use KVM but also do it from the command line, and on a Linux box. So, if you are doing this from a Mac or a Windows computer, the commands will differ from mine. I am also rushing through the permissions since I assume you know how to set them up so your disk image can be read by your vm. You have been warned.

  1. Shut the vm guest down. Yes, I know how to add a drive to a running vm -- I do that all the time when I have to do forensics -- but it is much easier and safer if you do not need to upset the virtual machine.
  2. Create the virtual drive you will use for /home. How big? Up to you. The one I created for my kali vm is 20GB (as close to real disk size units as I can). Remember to put it in a sane location, be it inside the directory where the other vm files are, a place such as /home/user/.local/share/libvirt/images/, or some other secure place. For this example I am using /export/vm.
    user@vmhost:~# VMNAME=kalinuts
    user@vmhost:~# qemu-img create -f qcow2 /export/vm/${VMNAME}.qcow2 20G
    Formatting '/export/vm/kalinuts.qcow2', fmt=qcow2 cluster_size=65536 
    extended_l2=off compression_type=zlib size=21474836480 lazy_refcounts=off 
    refcount_bits=16
    user@vmhost:~# 

    Most people will use qcow2 in KVM because its a sparse disk image (most may not be aware of that) and it is the default (duh!). If you use VirtualBox or VMWare or whatever, chances are the default disk format (vdi) will work fine; check if it can be resized to be sure. If not, find the virtual disk type that can.

    Remember we said it is a sparse disk image? Here is proof:

    user@vmhost:~# ls -lh /export/vm/kalinuts.qcow2 
    -rw-r--r-- 1 user user 193K Mar  2 09:51 /export/vm/kalinuts.qcow2
    user@vmhost:~# 
  3. Format the drive. Note that I did not say partition it.
    user@vmhost:~# mkfs.ext4 /export/vm/kalinuts.qcow2 
    mke2fs 1.46.2 (28-Feb-2021)
    
    Filesystem too small for a journal
    Discarding device blocks: done                            
    Creating filesystem with 192 1k blocks and 24 inodes
    
    Allocating group tables: done                            
    Writing inode tables: done                            
    Writing superblocks and filesystem accounting information: done
    
    user@vmhost:~# 
  4. Not needed step: I mounted it just to show I can mount the drive from the vm host side, since this is one of the claims I made ealier on.
    root@vmhost:~# mount /export/vm/kalinuts.qcow2 /mnt
    root@vmhost:~# df -h|grep /mnt
    /dev/loop0                            183K   14K  157K   9% /mnt
    root@vmhost:~# ls /mnt
    lost+found
    root@vmhost:~# 

    Don't forget to unmount it before going to the next step.

  5. Now add the drive to your kali/whatever vm. If you have a GUI, click on things. For KVM, there is also a GUI and some command line ways. The bottom line is that you want something like this in your devices session (adjust path and target device names to fit your local setup):
    <disk type='file' device='disk'>
       <driver name='qemu' type='qcow2' iommu='on'/>
       <source file='/export/vm/kalinuts.qcow2'/>
       <target dev='vdb' bus='virtio'/>
    </disk>

    When you save the config file, it will autofill the rest of the info such as where in the kali vm pci chain this disk will reside.

  6. Boot the kali vm and verify it can see the drive. I use dmesg or either fdisk -l or parted -l to see if it was mounted.
  7. While in the kali vm, become root user so you stop messing with /home
  8. Mount the new drive somewhere such as /mnt
  9. Move the contents from /home to /mnt. Remember: if this does not work you still have the files so you can move them back. Also, we are doing all this work to move all the junk in /home off the boot disk.
  10. Unmont the new drive from /mnt and configure the /etc/fstab so it will mount on /home (bolt line in the /etc/fstab file shown below)
    # /etc/fstab: static file system information.
    #
    # Use 'blkid' to print the universally unique identifier for a
    # device; this may be used with UUID= as a more robust way to name devices
    # that works even if disks are added and removed. See fstab(5).
    #
    # systemd generates mount units based on this file, see systemd.mount(5).
    # Please run 'systemctl daemon-reload' after making changes here.
    #
    #                
    # / was on /dev/vda1 during installation
    UUID=iisaw-something-under-my-armpit /               ext4    errors=remount-ro 0       1
    # swap was on /dev/vda5 during installation
    UUID=do-you-like-vogon-poetry none            swap    sw              0       0
    /dev/sr0        /media/cdrom0   udf,iso9660 user,noauto     0       0
    /dev/vdb        /home           ext4    defaults        0       2
    
  11. Reboot it and verify it is using the new drive. If not, correct the issue.
  12. Get a cold beer.

What about resizing the drive?

  1. Shut the vm down again.
  2. Resize the drive, maybe adding another 10G
    qemu-img resize /export/vm/kalinuts.qcow2 +10G
  3. Boot the vm.
  4. From inside the vm, resize the partition. Since I used ext4, I can do
    resize2fs /dev/vdb
  5. Enjoy the larger /home.

Fun fact: I normally use raw drives, but most of the steps are the same; I just need to have a different <drive></drive> definition.

Monday, October 15, 2018

Creating a .E01 forensics file from command line in Linux

If you have dealt with forensics, chances are you might have bumped with a .E01 file or two. That filetype is known as Expert Witness Compression Format (EWF), which is a proprietary image file format created by Guidance Software for their Windows-based forensic software family known as EnCase (used to be called Expert Witness). The idea (the following may sound like an infomercial) is that when you need to preserve a copy of the drive of a computer for forensics (duh!) analysis (and digital evidence), then run the program to create a snapshot of the disk, hidden and unallocated areas included. The file also keeps track of case info, including when investigators accessed it, while allowing to see the contents without changing them or their file stamps. This way, the chain of custody as defined by ASTM E1459-13, is preserved.

The Tools

I have used this program and it does its job well. But, I use Linux most of the time; can I replicate what it does just enough so I can create a proper .E01 file? Enter Joachim Metz. Hey may not be Bruce Lee but he did kick some ass by creating Libewf, a Linux/OSX open source tool to create and handle not only the .E01 file format but also .Ex01 and .Lx01. Source code can be found on github, but I will be lazy and get it as a package.

Steps

  1. Get the software. It is available on debian/ubuntu as ewf-tools:

    ewf-tools - collection of tools for reading and writing EWF files

    I did not check on CentOS or Arch, but I expect both to have it too. In any case, install the package any way you feel like.

  2. Get the drive we want to investigate. Usually we would boot the compromised system using a carefulyl crafted live USB disk, or mount the drive we cant to copy into our forensics computer. In this case we will be lazy because we just want to go through the motions: we will use the disk image foretest.iso created for an article in my other blog earlier this year.
    -rw-rw-r-- 1 raub raub 1073741824 Dec 13  2018 ./dev/hack/foretest.iso

    This image will play the part of a suspicious drive we want to do some forensics on. Just a FYI, I made a copy of foretest.iso and am working from that. I know that does not replicate real life, but I like to follow

    Rule #1: Always work from a copy.

    So,

    raub@desktop:~$ cp dev/hack/foretest{,_test}.iso
    raub@desktop:~$ ls -l dev/hack/foretest*
    -rw-rw-r-- 1 raub raub 1073741824 Oct 02 17:29 dev/hack/foretest.iso
    -rw-rw-r-- 1 raub raub 1073741824 Oct 13 13:37 dev/hack/foretest_test.iso
    raub@desktop:~$ sha256sum dev/hack/foretest*.iso
    49bc20df15e412a64472421e13fe86ff1c5165e18b2afccf160d4dc19fe68a14  dev/hack/foretest.iso
    49bc20df15e412a64472421e13fe86ff1c5165e18b2afccf160d4dc19fe68a14  dev/hack/foretest_test.iso
    raub@desktop:~$
  3. Create the .E01 file. We should not try to mount the drive because that can change its contents somehow. Instead we are passing it as an argument; if it was a physical drive we could pass it as, say ,tt>/dev/sdd. During the startup, it asks a few questions to create the forensics case; remember chain of command!
    raub@desktop:~$ ewfacquire -t dev/hack/forensics/001_2018_Suspicious dev/hack/fo
    retest_test.iso
    ewfacquire 20140807                                                             
    
    Storage media information:                                                      
    Type:                                   RAW image
    Media size:                             1.0 GB (1073741824 bytes)
    Bytes per sector:                       512
                                                                                    
    Acquiry parameters required, please provide the necessary input                 
    Case number: 001
    Description: Strange growth I found under my armpit on a summerday morning
    Evidence number: 001
    Examiner name: Clueless Bob                                                     
    Notes: File is not in the right shade of fuscia                                 
    Media type (fixed, removable, optical, memory) [fixed]: 
    Media characteristics (logical, physical) [physical]: 
    Use EWF file format (ewf, smart, ftk, encase1, encase2, encase3, encase4, encase
    5, encase6, linen5, linen6, ewfx) [encase6]: ewf                             
    Compression method (deflate) [deflate]:                                         
    Compression level (none, empty-block, fast, best) [none]: 
    Start to acquire at offset (0 <= value <= 1073741824) [0]: 
    The number of bytes to acquire (0 <= value <= 1073741824) [1073741824]: 
    Evidence segment file size in bytes (1.0 MiB <= value <= 1.9 GiB) [1.4 GiB]: 
    The number of bytes per sector (1 <= value <= 4294967295) [512]: 
    The number of sectors to read at once (16, 32, 64, 128, 256, 512, 1024, 2048, 40
    96, 8192, 16384, 32768) [64]: 
    The number of sectors to be used as error granularity (1 <= value <= 64) [64]: 
    The number of retries when a read error occurs (0 <= value <= 255) [2]: 
    Wipe sectors on read error (mimic EnCase like behavior) (yes, no) [no]: 
    
    The following acquiry parameters were provided:
    Image path and filename:                dev/hack/forensics/001_2018_Suspicious.e
    01
    Case number:                            001
    Description:                            Strange growth I found under my armpit o
    n a summerday morning
    Evidence number:                        001
    Examiner name:                          Clueless Bob
    Notes:                                  File is not in the right shade of fuscia
    Media type:                             fixed disk
    Is physical:                            yes                                     
    EWF file format:                        original EWF (.e01)
    Compression method:                     deflate                                
    Compression level:                      none                                    
    Acquiry start offset:                   0
    Number of bytes to acquire:             1.0 GiB (1073741824 bytes)              
    Evidence segment file size:             1.4 GiB (1572864000 bytes)
    Bytes per sector:                       512                                    
    Block size:                             64 sectors                              
    Error granularity:                      64 sectors
    Retries on read error:                  2                                       
    Zero sectors on read error:             no                                                                                                                      
    Continue acquiry with these values (yes, no) [yes]:                             
                        
    Acquiry started at: Oct 13, 2018 14:22:45                                       
    This could take a while.                                                                                                                                        
    Status: at 2%.                                                                  
            acquired 24 MiB (25919488 bytes) of total 1.0 GiB (1073741824 bytes).
            completion in 3 minute(s) and 16 second(s) with 5.1 MiB/s (5368709 bytes
    /second).                                                                                                                                                       
    Status: at 2%.                                                                  
            acquired 25 MiB (26705920 bytes) of total 1.0 GiB (1073741824 bytes).
            completion in 13 minute(s) and 53 second(s) with 1.2 MiB/s (1263225 byte
    s/second).
    [...]
    Status: at 97%.
            acquired 995 MiB (1044348928 bytes) of total 1.0 GiB (1073741824 bytes).
            completion in 15 second(s) with 2.0 MiB/s (2126221 bytes/second).
    
    Acquiry completed at: Oct 13, 2018 14:31:08
    
    Written: 1.0 GiB (1073742012 bytes) in 8 minute(s) and 23 second(s) with 2.0 MiB/s (2134675 bytes/second).
    MD5 hash calculated over data:          cd573cfaace07e7949bc0c46028904ff
    ewfacquire: SUCCESS
    raub@desktop:~$ 


    This was rather fast because the drive was just 1GB. In a real case it would have taken hours. Note it did not ask to encrypt 001_2018_Suspicious.e01; I do not know if that is a limitation of the code or just me who should have read the docs before writing this up. And, I can't keep a straight face about the MD5 sum. The resulting file looks like this

    raub@desktop:~$ ls -lh dev/hack/forensics/
    total 1.1G
    -rw-r--r-- 1 raub raub 1.1G Oct 13 14:31 001_2018_Suspicious.e01
    raub@desktop:~$ 

    Note it is bigger than the original file as it adds all the information we mentioned. Let's see what it knows about the file

    raub@desktop:~$ ewfinfo  dev/hack/forensics/001_2018_Suspicious.e01             
    ewfinfo 20140807
                        
    Acquiry information                                                             
            Case number:            001                                             
            Description:            Strange growth I found under my armpit on a summ
    erday morning  
            Examiner name:          Clueless Bob                                   
            Evidence number:        001                                             
            Notes:                  File is not in the right shade of fuscia
            Acquisition date:       Sat Oct 13 14:22:45 2018
            System date:            Sat Oct 13 14:22:45 2018                       
            Password:               N/A                                             
    
    EWF information
            File format:            EnCase 1                                        
            Sectors per chunk:      64                                              
            Compression method:     deflate
            Compression level:      no compression
                                                                                    
    Media information                                                               
            Media type:             removable disk
            Is physical:            no                                              
            Bytes per sector:       512                                             
            Number of sectors:      2097152                                                 
            Media size:             1.0 GiB (1073741824 bytes)
                        
    Digest hash information                                                         
            MD5:                    cd573cfaace07e7949bc0c46028904ff         
    
    raub@desktop:~$ 

    and verify its integrity.

    raub@desktop:~$ ewfverify  dev/hack/forensics/001_2018_Suspicious.e01 
    ewfverify 20140807
    
    Verify started at: Oct 13, 2018 14:46:17 
    This could take a while.
    
    Status: at 4%.
            verified 44 MiB (46891008 bytes) of total 1.0 GiB (1073741824 bytes).
            completion in 1 minute(s) and 36 second(s) with 10 MiB/s (10737418 bytes
    /second).
    
    [...]
    Status: at 94%.
            verified 972 MiB (1019871232 bytes) of total 1.0 GiB (1073741824 bytes).
            completion in 5 second(s) with 11 MiB/s (12064514 bytes/second).
    
    Verify completed at: Oct 13, 2018 14:47:43
    
    Read: 1.0 GiB (1073741824 bytes) in 1 minute(s) and 26 second(s) with 11 MiB/s (12485370 bytes/second).
    
    MD5 hash stored in file:                cd573cfaace07e7949bc0c46028904ff
    MD5 hash calculated over data:          cd573cfaace07e7949bc0c46028904ff
    
    ewfverify: SUCCESS
    raub@desktop:~$ 

    Yes, more MD5-ness for your amusement. I was going to go over mounting/accessing 001_2018_Suspicious.e01 but just realized this article has become rather long. I will go over that part in a future article.

References